Using Security Groups with Virtual Machines (Instances)
- date:
2015-11-30
Security Groups Overview
A security group is a container for security group rules. Security groups and security group rules allow administrators to specify the type of traffic that is allowed to pass through a port. When a virtual machine (VM) is created in a virtual network (VN), a security group can be associated with the VM when it is launched. If a security group is not specified, a port is associated with a default security group. The default security group allows both ingress and egress traffic. Security rules can be added to the default security group to change the traffic behavior.
Creating Security Groups and Adding Rules
A default security group is created for each project. You can add security rules to the default security group and you can create additional security groups and add rules to them. The security groups are then associated with a VM, when the VM is launched or at a later date.
To add rules to a security group:
From the OpenStack interface, click the Project tab, select Access & Security, and click the Security Groups tab.
Any existing security groups are listed under the Security Groups tab, including the default security group.
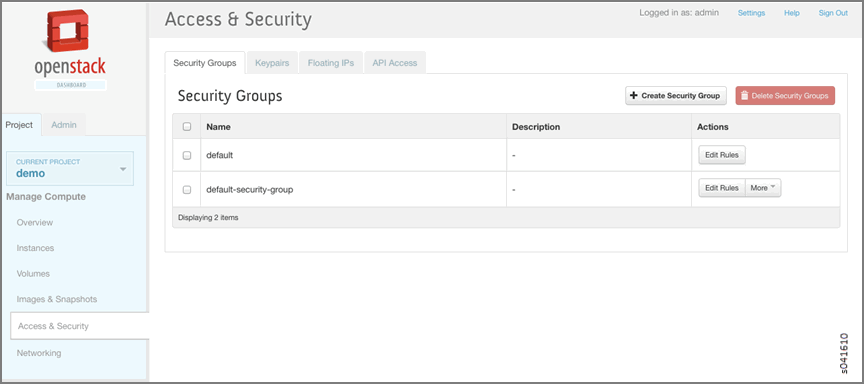
Select the default-security-group and click Edit Rules in the Actions column.
The Edit Security Group Rules window is displayed. Any rules already associated with the security group are listed.
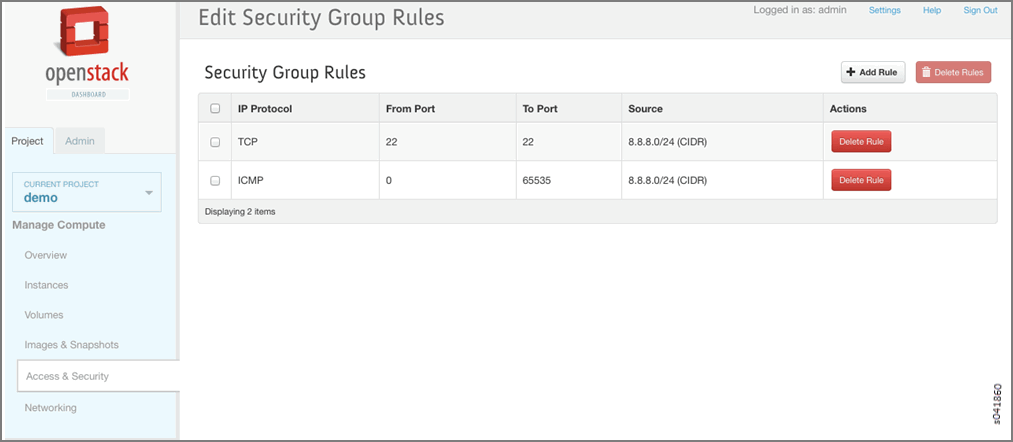
Click Add Rule to add a new rule.
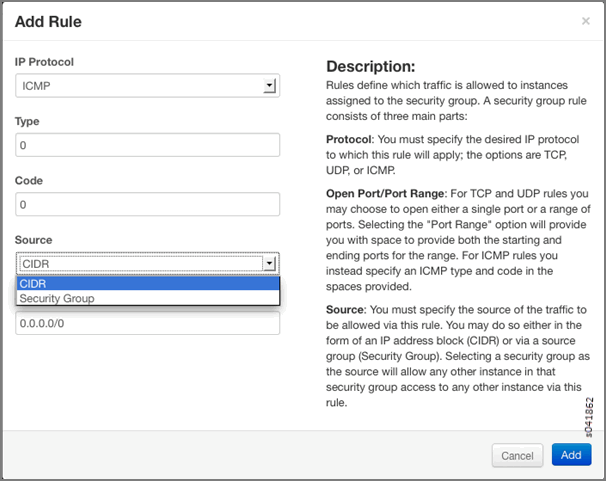
Table 1: Add Rule Fields
Column
Description
IP Protocol
Select the IP protocol to apply for this rule: TCP, UDP, ICMP.
From Port
Select the port from which traffic originates to apply this rule. For TCP and UDP, enter a single port or a range of ports. For ICMP rules, enter an ICMP type code.
To Port
The port to which traffic is destined that applies to this rule, using the same options as in the From Port field.
Source
Select the source of traffic to be allowed by this rule. Specify subnet—the CIDR IP address or address block of the inter-domain source of the traffic that applies to this rule, or you can choose security group as source. Selecting security group as source allows any other instance in that security group access to any other instance via this rule.
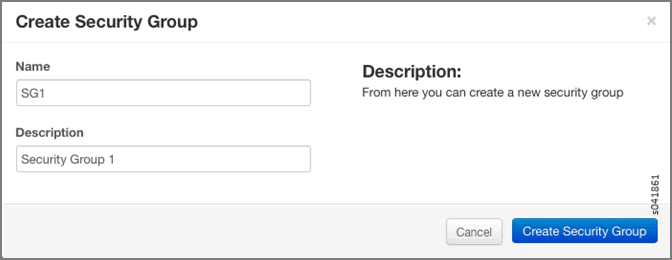
Click Create Security Group to create additional security groups.
The Create Security Group window is displayed.
Each new security group has a unique 32-bit security group ID and an ACL is associated with the configured rules.
When an instance is launched, there is an opportunity to associate a security group.
In the Security Groups list, select the security group name to associate with the instance.
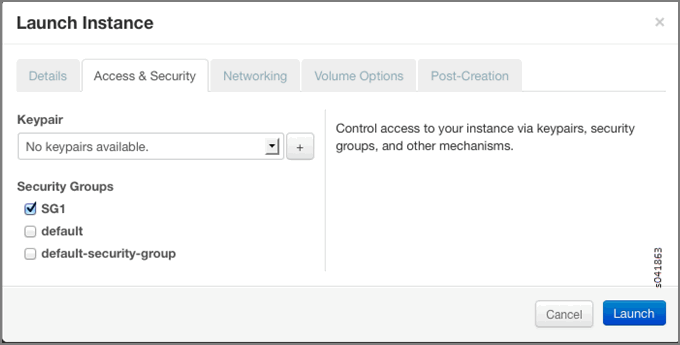
You can verify that security groups are attached by viewing the
SgListReqandIntfReqassociated with theagent.xml.